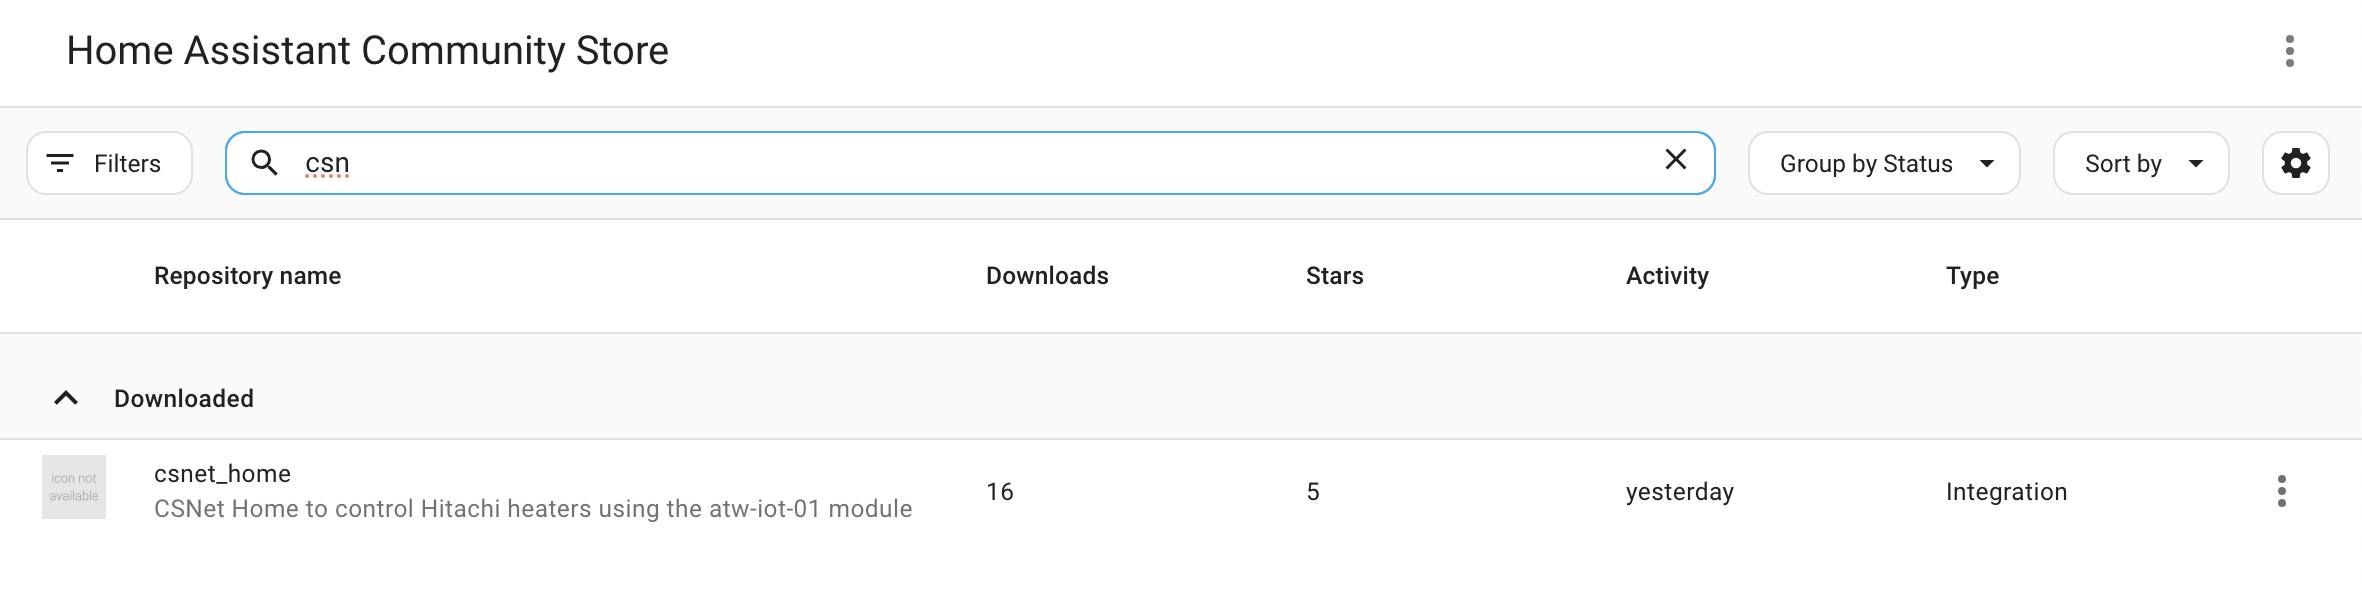
Configuration Guide
This guide will help you configure the Hitachi CSNet Home integration after installation.
Prerequisites
Before configuring, ensure:
✅ Integration is installed (see Installation Guide)
✅ Home Assistant has been restarted
✅ You have your CSNet Manager credentials ready
✅ Your Hitachi system is connected to CSNet Manager and working
Initial Configuration
Step 1: Add the Integration
- Open Home Assistant
- Navigate to Settings → Devices & Services
- Click the + Add Integration button (bottom right)
- Search for "Hitachi" or "CSNet"
- Click on Hitachi CSNet Home
Step 2: Enter Your Credentials
You'll see a configuration dialog with the following fields:
| Field | Description | Example |
|---|---|---|
| Username | Your CSNet Manager username | user@example.com |
| Password | Your CSNet Manager password | •••••••• |
| Scan Interval | Update frequency in seconds (default: 60) | 60 |
| Language | Alarm message language | en or fr |
| Max Temp Override | Optional maximum temperature override (8-80°C) | 45 (leave empty for auto) |
[PLACEHOLDER: Screenshot of configuration dialog]
Field Details
Username & Password - Use the same credentials you use for: - CSNet Manager mobile app - CSNet Manager website (www.csnetmanager.com) - Credentials are stored securely in Home Assistant
Scan Interval (Optional) - How often Home Assistant checks for updates (in seconds) - Default: 60 seconds (recommended) - Minimum: 30 seconds (don't set lower to avoid rate limits) - Maximum: 300 seconds (5 minutes) - Lower values = more responsive, but more API calls - Higher values = less responsive, but lower load
Language (Optional) - Choose the language for alarm messages - Options: en (English) or fr (French) - Default: en - Can be changed later by reconfiguring
Max Temp Override (Optional, Advanced) - Allows you to override the maximum temperature limit for all climate entities - Range: 8-80°C - Default behavior (when empty): - Air circuits (standard heat pumps): 35°C maximum - Water circuits (Yutaki/Hydro systems): 80°C maximum
- Water heaters (DHW): 80°C maximum - Use cases: - Special hardware configurations - Testing purposes - Custom installations requiring non-standard limits - ⚠️ Warning: Setting this above manufacturer specifications may prevent your system from reaching the target temperature - 💡 Recommendation: Leave empty unless you have a specific reason to override
Step 3: Submit Configuration
- Enter your credentials
- Adjust scan interval if needed (60 seconds is recommended)
- Select your preferred language
- Click Submit
Step 4: Wait for Authentication
The integration will: 1. Connect to CSNet Manager 2. Authenticate your credentials 3. Retrieve your system configuration 4. Create entities for your devices
This usually takes 5-10 seconds.
Step 5: Verify Success
If successful, you'll see: - Configuration created message - New devices in Settings → Devices & Services - Entities created for your zones and sensors
[PLACEHOLDER: Screenshot of successful configuration]
What Gets Created
After configuration, the integration automatically creates entities based on your system.
Devices
One device is created for each zone/thermostat in your system:
Device Name Format: {Device Name}-{Zone Name}
Example: Remote-Living Room
Each device includes: - Climate entity - Multiple sensors - Device information (model, firmware, etc.)
Entities Per Zone
For each zone (C1, C2, etc.), you get:
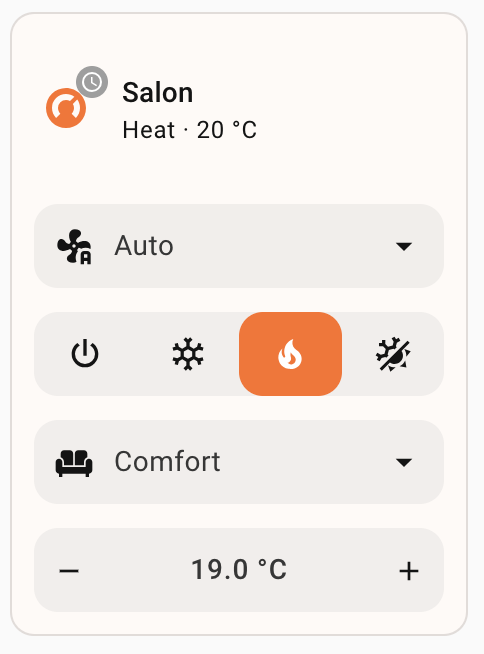
Climate Entity
- Entity ID:
climate.{device_name}_{zone_name} - Example:
climate.remote_living_room - Controls temperature, mode, and presets
Temperature Sensors
- Current Temperature:
sensor.{device}_current_temperature - Target Temperature:
sensor.{device}_setting_temperature
Status Sensors
- Mode:
sensor.{device}_mode(Heat, Cool, Auto) - On/Off:
sensor.{device}_on_off - Alarm Code:
sensor.{device}_alarm_code - Alarm Active:
sensor.{device}_alarm_active - Alarm Message:
sensor.{device}_alarm_message - Doing Boost:
sensor.{device}_doingBoost
Device Sensors
- WiFi Signal:
sensor.{device}_wifi_signal - Connectivity:
sensor.{device}_connectivity - Last Communication:
sensor.{device}_last_communication
Water Heater Entity (If applicable)
If your system has DHW (Domestic Hot Water):
- Entity ID:
water_heater.{device_name}_dhw - Example:
water_heater.remote_dhw - Controls water heater temperature and operation mode
System-Wide Sensors
Additional sensors for overall system monitoring:
Water System Sensors
sensor.system_controller_pump_speedsensor.system_controller_water_flowsensor.system_controller_in_water_temperaturesensor.system_controller_out_water_temperaturesensor.system_controller_set_water_temperaturesensor.system_controller_water_pressuresensor.system_controller_gas_temperaturesensor.system_controller_liquid_temperature
Environmental Sensors
sensor.system_controller_outdoor_temperaturesensor.system_controller_outdoor_average_temperaturesensor.system_controller_weather_temperature
System Status Sensors
sensor.system_controller_defrostsensor.system_controller_mix_valve_positionsensor.system_controller_central_control_enabledsensor.system_controller_unit_modelsensor.system_controller_lcd_software_version
Configuration Sensors
sensor.system_controller_fan_coil_compatiblesensor.system_controller_c1_thermostat_presentsensor.system_controller_c2_thermostat_presentsensor.system_controller_cascade_slave_mode
OTC (Outdoor Temperature Compensation) Sensors
sensor.system_controller_otc_heating_type_c1sensor.system_controller_otc_cooling_type_c1sensor.system_controller_otc_heating_type_c2sensor.system_controller_otc_cooling_type_c2
Alarm Sensors
sensor.alarm_history- Recent alarm historysensor.total_alarms- Total alarm countsensor.active_alarms- Currently active alarmssensor.alarms_by_origin- Alarms grouped by origin
Configuration Examples
Example 1: Single Zone with DHW
System: Yutaki S with 1 zone and water heater
Created Entities: - climate.remote_zone_1 - Main zone climate control - water_heater.remote_dhw - Water heater - sensor.remote_zone_1_current_temperature - sensor.remote_zone_1_target_temperature - Plus all system-wide sensors
Example 2: Two Zones (C1 and C2)
System: Yutaki S with floor heating on 2 floors
Created Entities: - climate.remote_first_floor - C1 circuit - climate.remote_second_floor - C2 circuit - Sensors for each zone - System-wide sensors
Example 3: Multi-Zone with DHW
System: Yutaki SC with 2 thermostats + DHW
Created Entities: - climate.remote_living_room - C1 thermostat - climate.remote_bedrooms - C2 thermostat - water_heater.remote_dhw - Water heater - All zone sensors - All system sensors
Example 4: Fan Coil System
System: Fan coil compatible with 2 zones
Created Entities: - climate.remote_zone_1 - With fan speed control - climate.remote_zone_2 - With fan speed control - Additional fan speed attributes and sensors
Customizing Entity Names
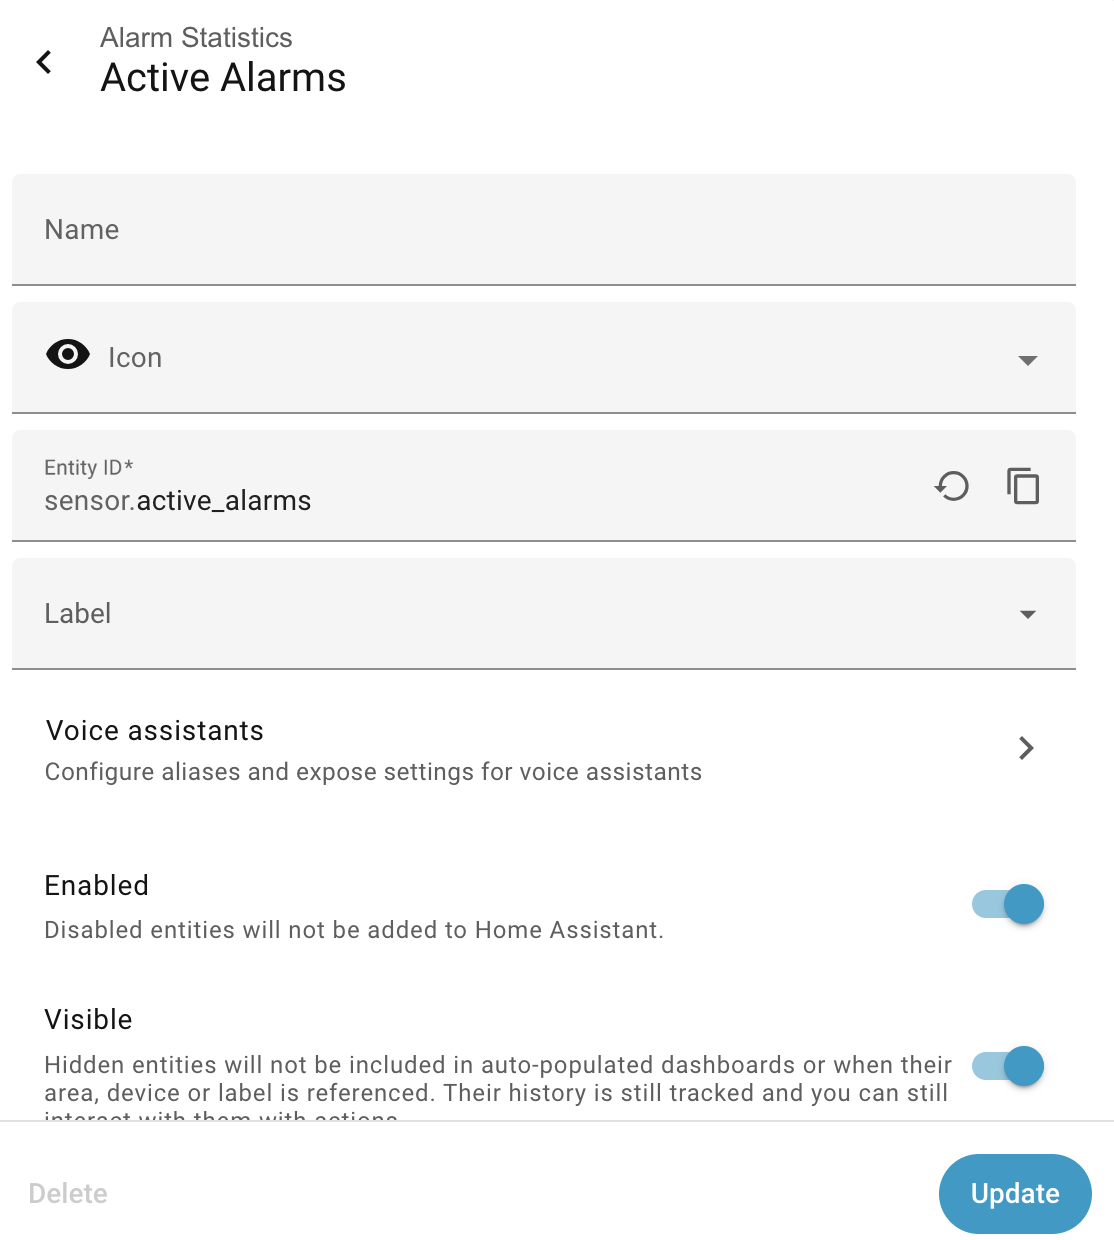
After creation, you can customize entity names:
Renaming Entities
- Go to Settings → Devices & Services → Entities
- Search for your CSNet entities
- Click on an entity
- Click the Settings icon (gear)
- Change Name and/or Entity ID
- Click Update
Organizing with Areas
Assign entities to Home Assistant areas:
- Go to Settings → Devices & Services
- Click on your CSNet device
- Click Area dropdown
- Select or create an area (e.g., "Living Room", "First Floor")
- Entities will be grouped by area in the UI
Creating Groups
Group related entities:
# configuration.yaml
group:
  heating_first_floor:
    name: First Floor Heating
    entities:
      - climate.remote_first_floor
      - sensor.remote_first_floor_current_temperature
      - sensor.remote_first_floor_target_temperature
Advanced Configuration Options
Adjusting Scan Interval
To change the scan interval after initial setup:
- Go to Settings → Devices & Services
- Find Hitachi CSNet Home
- Click Configure
- Adjust Scan Interval
- Click Submit
Recommendations: - Normal use: 60-120 seconds - Active monitoring: 30-60 seconds - Low priority: 180-300 seconds
Changing Language
To change the alarm message language:
- Go to Settings → Devices & Services
- Find Hitachi CSNet Home
- Click Configure
- Change Language
- Click Submit
- Restart Home Assistant to apply changes
Enabling Debug Logging
For troubleshooting, enable detailed logging:
After adding, restart Home Assistant and check logs: - Settings → System → Logs - Filter for csnet_home
Troubleshooting Configuration
Authentication Failed
Problem: "Invalid credentials" or "Authentication failed"
Solutions: 1. Verify credentials: Test login at CSNet Manager website 2. Check for typos: Carefully re-enter username and password 3. Reset password: Use CSNet Manager to reset if needed 4. Check account status: Ensure account is active
No Entities Created
Problem: Configuration succeeds but no entities appear
Solutions: 1. Wait a few minutes: Initial sync can take time 2. Check device: Go to Settings → Devices & Services → Devices 3. Restart HA: Sometimes requires a restart to appear 4. Check logs: Look for errors in Settings → System → Logs 5. Verify CSNet setup: Ensure devices show in CSNet Manager app
Wrong Number of Entities
Problem: Expected more/fewer zones or sensors
Solutions: 1. Check CSNet Manager: Verify how many zones are configured there 2. Review system type: Some sensors only appear for specific configurations 3. Check DHW: Water heater entity only created if DHW is configured 4. Reload integration: Try removing and re-adding
Connection Timeout
Problem: Configuration times out
Solutions: 1. Check internet: Verify Home Assistant can reach internet 2. Check firewall: Ensure CSNet Manager domain is accessible 3. Increase timeout: May need to wait longer for slow connections 4. Retry: Sometimes CSNet Manager servers are slow
Duplicate Entities
Problem: Entities created multiple times
Solutions: 1. Remove old configuration: Delete the integration completely 2. Clean up entities: Manually remove duplicate entities 3. Restart HA: Restart before re-adding 4. Re-add integration: Configure from scratch
Reconfiguring
To change configuration:
Option 1: Reconfigure (Keeps Data)
- Go to Settings → Devices & Services
- Find Hitachi CSNet Home
- Click Configure
- Update settings
- Click Submit
Option 2: Remove and Re-add (Fresh Start)
- Go to Settings → Devices & Services
- Find Hitachi CSNet Home
- Click ⋮ (three dots)
- Select Delete
- Confirm deletion
- Wait 10 seconds
- Add integration again (see Step 1)
Note: Removing the integration will: - ❌ Delete all entities - ❌ Remove from automations and dashboards - ❌ Clear historical data - ✅ Allow fresh configuration
Verifying Configuration
After configuration, verify everything is working:
Check Climate Entities
- Go to Settings → Devices & Services → Entities
- Filter by
climate. - Verify you see your expected zones
- Click on each to verify current temperature is reading
Check Water Heater (If applicable)
- Filter entities by
water_heater. - Verify DHW entity exists
- Check current temperature reading
Check Sensors
- Filter entities by
sensor. - Look for your zone sensors
- Verify system sensors are reporting
- Check for any "Unknown" or "Unavailable" states
Test Controls
- Open a climate entity
- Try changing target temperature
- Verify change reflects in CSNet Manager app
- Try changing mode (Heat/Cool)
- Test preset modes (Eco/Comfort)
Next Steps
✅ Configuration complete!
Now explore: - Climate Control Guide - Learn to control your zones - Water Heater Control - Manage your DHW - Sensors Reference - Understand all sensors - Advanced Features - Silent mode, fan control, OTC - Multi-Zone Configuration - Managing multiple circuits
Getting Help
If you need assistance: - Check Troubleshooting for common issues - Review FAQ for frequent questions - Ask in GitHub Discussions - Report bugs in GitHub Issues